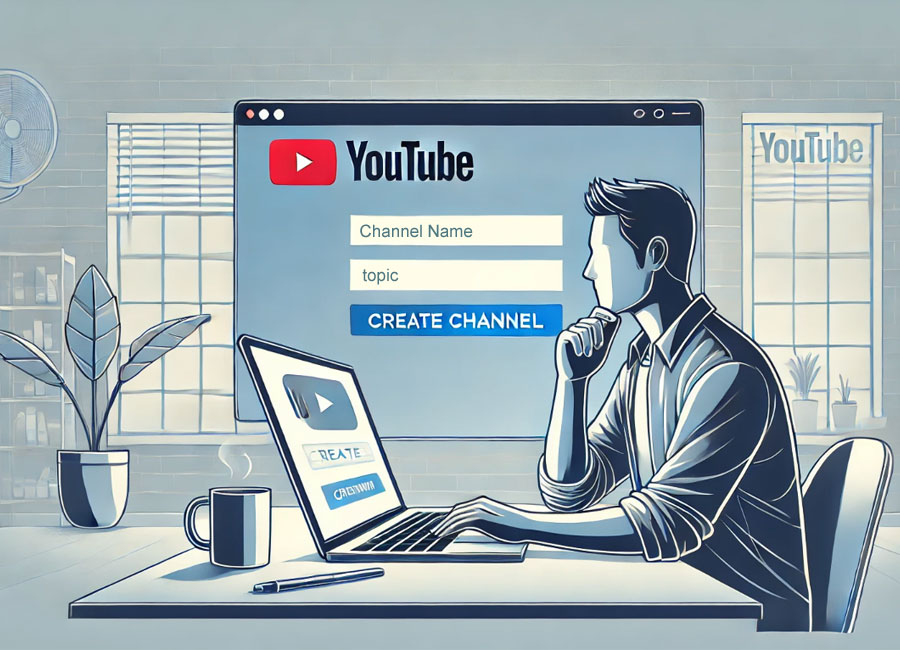
Ready to dive into the world of YouTube? Let’s create your own channel together! so in this quick guide, I’ll show you exactly how to make a YouTube channel in no time! No prior knowledge needed, and the process is super simple.
We’ll go through the key steps to building a successful YouTube channel. With the rapid growth of video platforms, YouTube has become one of the most powerful tools for sharing content and attracting an audience.
In this article, I’ll walk you through the basics, from choosing the perfect channel name to setting up your account the right way. Let’s get started!
With the growing number of YouTube users and the fierce competition in this space, building a successful channel requires careful planning, effective strategies, and high-quality content creation. From picking the right channel name and crafting its visual identity to creating engaging videos and optimizing them for search engines, every step in the process matters. This guide will walk you through the key steps to creating a successful YouTube channel.
Step 1: Create a Gmail Account
Every YouTube channel is built upon a Gmail account, So, the first step is to create a Gmail account if you don’t already have one. However, if you already have a Gmail account, there’s no need to create a new one.
To create a new Gmail account, simply go to https://mail.google.com or search for “create gmail” in your browser’s search bar.
Then, the following page will be displayed. In the top right corner, click on “Create an account”, and then select “For my personal use”. (If you already have a Gmail address, click on the Sign in Button)

If you choose the first option, you’ll create a personal account, and selecting the Second option will set up a public or brand account. It doesn’t really matter which option you choose, as you can change it later. For now, I will select “For my personal use”
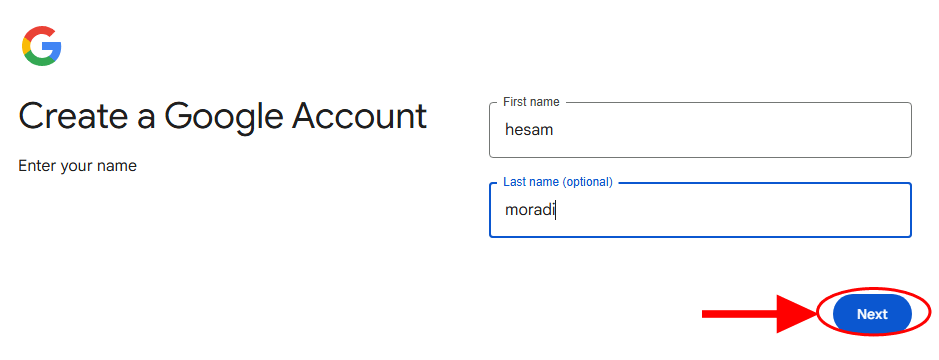
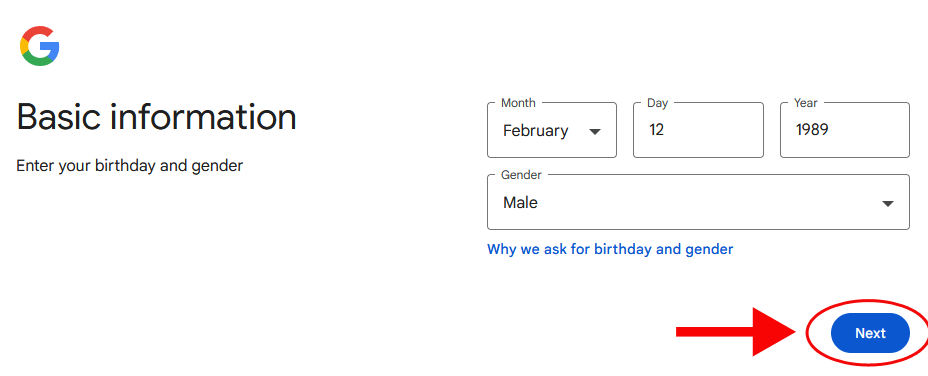
By selecting this option, pages will open that ask for personal information including your first name, last name, date of birth, and gender. After entering this information, click on the “Next” button.
Next, you should choose a Gmail address for yourself and click the “Next” button. If the selected address is not verified by Google, you can try again and choose other addresses. You can also use the options suggested in the “Available” section.

For example, I selected the address “hesam.moradi67,” but Google won’t let me register it because someone else has already taken it. So, now I need to look for other available options.
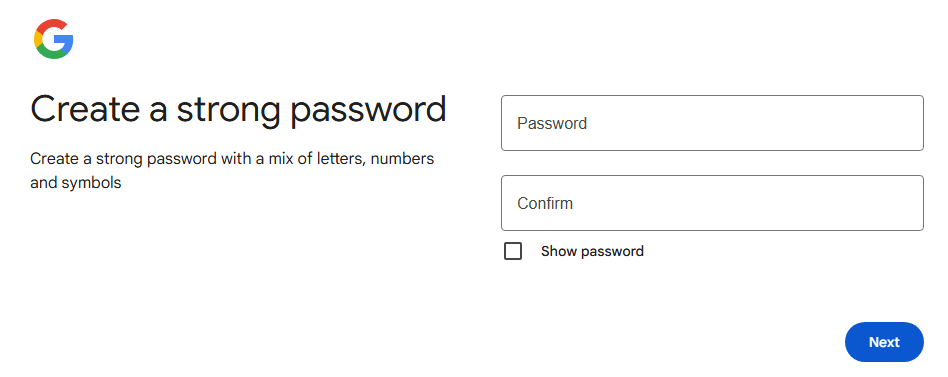
Now it’s time to choose a password for your Gmail. The password you choose must be at least 8 characters long and include both lowercase and uppercase letters, as well as numbers and symbols. Enter the password again in the Confirm field, then click the Next button.
Congratulations! You have now created your Gmail account.
Step 2: make YouTube channel
After creating your Gmail account, go to the YouTube website (https://www.youtube.com). If you encounter a message like this, click on “Accept All”. However, if you’ve been a Goody-Goody, YouTube might not show it to you. 😁

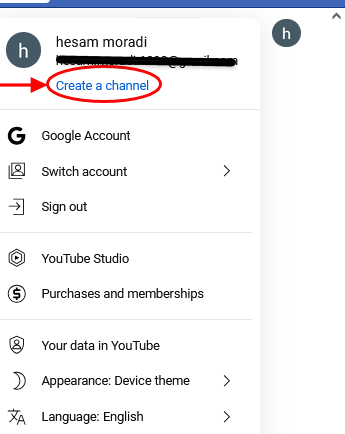
Upon entering YouTube, you will likely be logged into the new account you just created. If not, click on your profile picture and select your account. This button is located at the top right corner and looks like a circle. If this option is not displayed, click on the Sign in button.
To create a personal channel, click on your profile picture and select “Create a channel”, as shown in the image below. If you can’t find this option, click directly on the following link to go to the channel creation page. https://www.youtube.com/channel_switcher
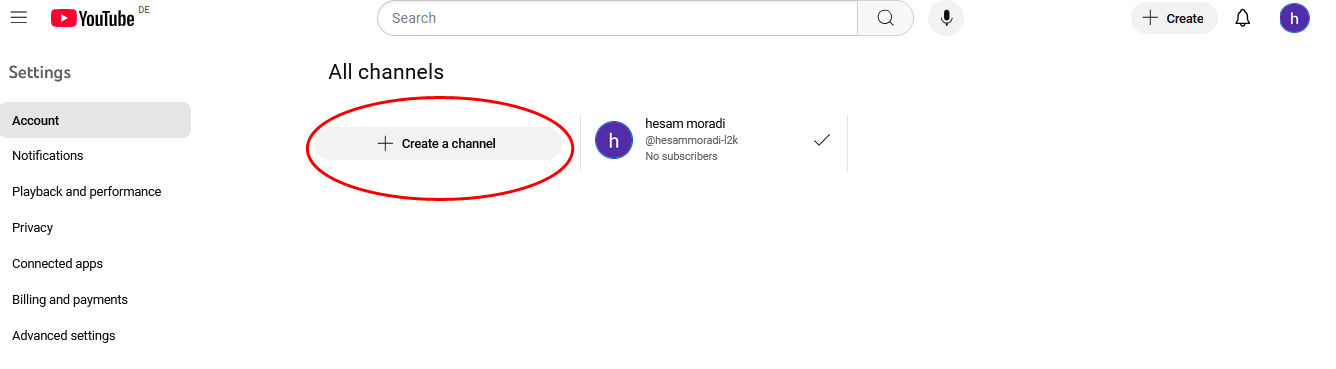
Finally, you should reach a page like this. On this page, click the Create a channel button.
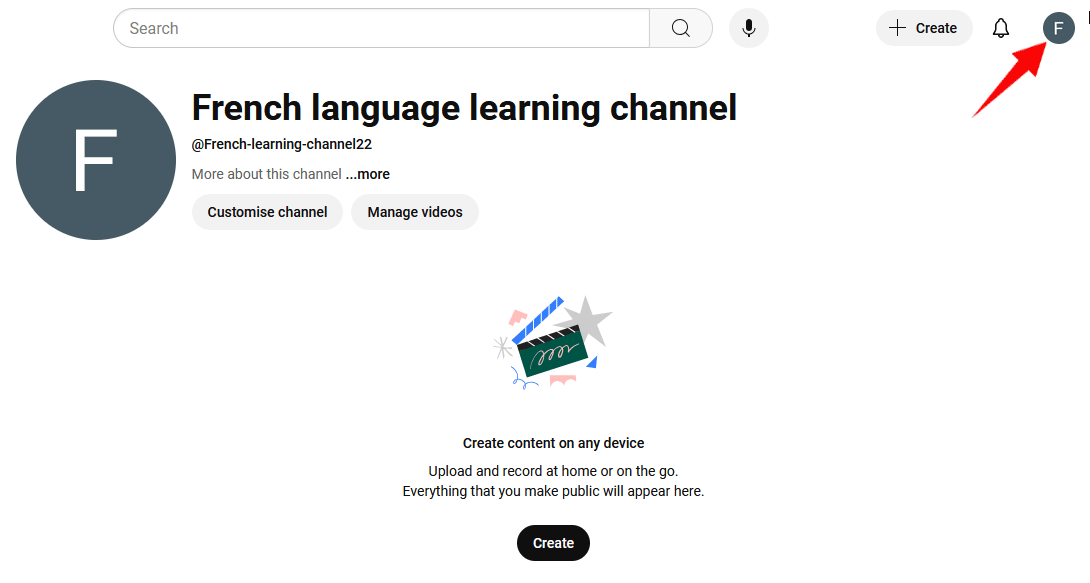
In the new window, you will be asked to choose a title (Name) and an address (Handle) for your new channel. Fill in these two fields. Don’t worry, if you don’t like them later, you can change them.

For example, if I want to start a French language learning channel, I would enter “French language learning channel” in the Name section and “French-learning-channel22” in the Handle section.
However, all my knowledge of French is just one word: Bonjour. 😁
Next, click the “Create Channel” button.
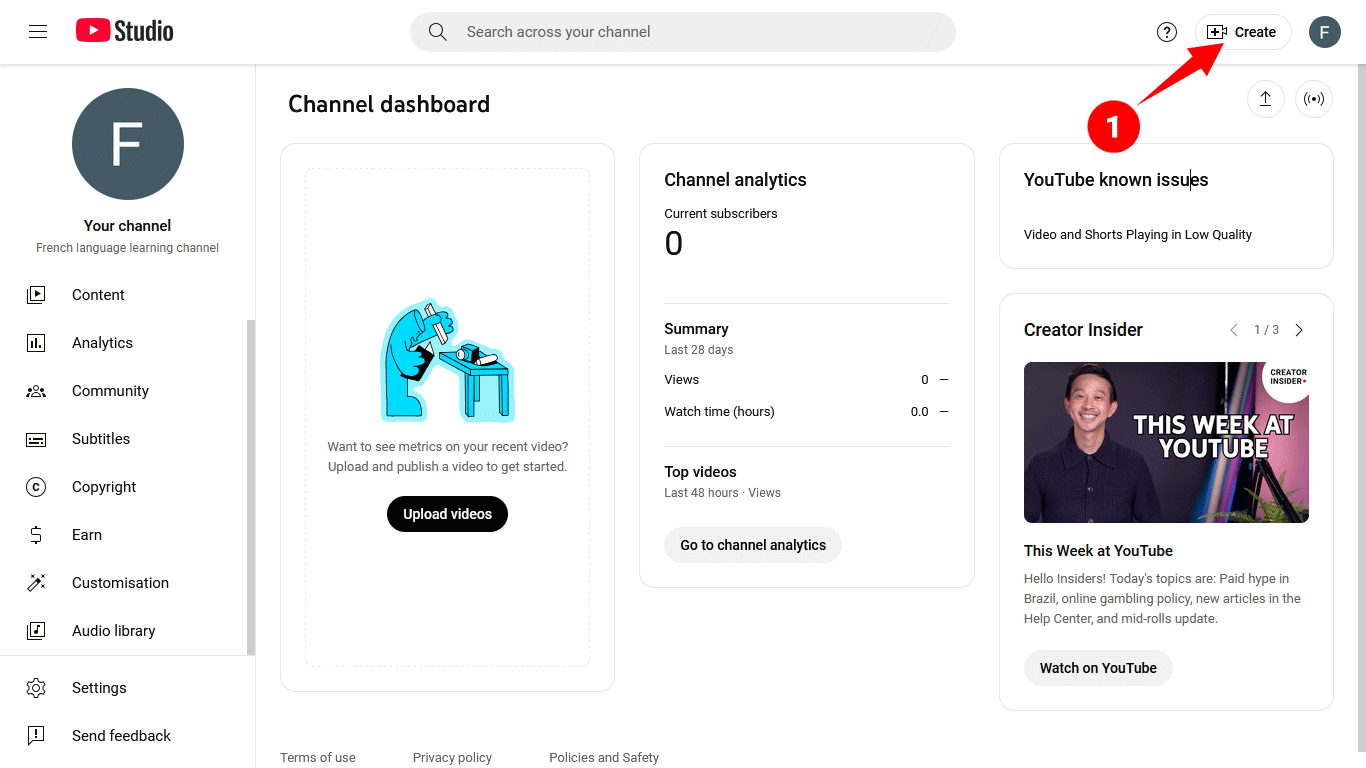
It’s hard to believe, but our YouTube channel has been created! However, it’s empty for now, and no videos have been uploaded yet. To get started, you need to verify the channel. So, click on the circular button in the top right corner. Then, select “YouTube Studio.”
In the YouTube Studio window, click on the “Settings” option on the right side. This will open another window. Then, click on “Channel.” Next, go to the “Feature eligibility” section. Click on the small arrow next to “Intermediate features.” Then, select “Verify phone number.” Enter your phone number and click the “Verify” button. And that’s it!

Step 3: upload your first video on YouTube channel
Now, get started by clicking the “Create” button, which is always located in the top right corner. Then, select “Upload Video.”
Don’t be a perfectionist—upload your first video as soon as possible! It doesn’t have to be perfect; what matters is that you keep improving little by little every day. And always remember this from me:
No YouTuber started as a pro from day one!
hesam moradi
In the next tutorials, I will show you how to better set up a video for uploading.
I regularly publish YouTube-related tutorials on this site, and I’d be happy if you follow it every week. These new lessons will be under the ‘ YouTube Tutorials ‘ category. If you have any questions or feedback about the tutorial above, please feel free to ask me in the comments. I’d be happy to guide you.


Leave a Comment